
Introduction
You install a commercial SSL/TLS certificate by generating a CSR and private key, submitting the CSR to a trusted certificate authority (CA), validating domain control, then installing the issued certificate and intermediate chain on your web server. The result is HTTPS with browser trust and, for OV/EV options, additional organization verification by the CA (useful for internal policy, procurement, or compliance needs).
Before the mid-2010s, many smaller websites did not always use SSL or HTTPS. Since then, expectations of security have increased, and the Let’s Encrypt project was created to provide free, trusted SSL certificates at scale, allowing almost everyone to use HTTPS as needed.
However, there are some limitations to Let’s Encrypt’s certificates. They expire every 90 days, which typically requires a functioning auto-renewal process. Let’s Encrypt can also be harder to use in environments where automation is restricted or where outbound validation challenges (such as DNS updates for wildcard certificates) are not feasible. In addition, commercial CAs may offer certificate management features, warranty/insurance terms, or organization vetting that some businesses and compliance programs prefer.
This tutorial walks you through choosing a CA, generating a CSR and private key, obtaining the certificate, and installing it on Nginx or Apache on Ubuntu. You will also see how to verify the installation, fix common certificate chain issues, and handle renewal.
Key Takeaways
- Commercial SSL fits specific needs: longer validity without frequent renewal automation, OV/EV for organization vetting needs, or vendor features (support SLAs, managed reissues, warranty/contract terms).
- CSR and private key stay on your server: you only send the CSR to the CA; the private key never leaves the machine.
- The certificate chain must be complete: serve your site certificate plus the CA’s intermediate(s); missing intermediates cause browser trust errors.
- Nginx needs a chained file: concatenate your certificate and intermediate(s) into one file; Apache can reference the intermediate file separately.
- Always verify after install: use
openssl s_clientor a browser to confirm the chain and that HTTPS and HTTP-to-HTTPS redirect work. - Set a renewal reminder: commercial certificates typically expire in 1-2 years; missing renewal causes outages.
Prerequisites
There are several prerequisites to attempting to obtain an SSL certificate from a commercial CA:
-
A registered domain name. This tutorial will use
example.comthroughout. You can purchase a domain name from a registrar such as Namecheap, or your provider of choice. Some hosting providers bundle domains with hosting plans, depending on availability. -
Access to one of the email addresses on your domain’s WHOIS record or to an “admin type” email address at the domain itself. Certificate authorities that issue SSL certificates will typically validate domain control by sending a validation email to one of the addresses on the domain’s WHOIS record, or to a generic admin email address at the domain itself. To be issued an Extended Validation certificate, you will also be required to provide the CA with paperwork to establish the legal identity of the website’s owner, among other things.
-
DNS records set up for your server. If you are using DigitalOcean, please see our DNS documentation for details on how to add them.
This tutorial uses an Ubuntu server (compatible with Ubuntu 22.04 and 24.04) set up by following initial server setup with Ubuntu, including a sudo-enabled non-root user and a firewall.
You should also have Nginx or Apache installed, following How To Install Nginx on Ubuntu or How To Install the Apache Web Server on Ubuntu. Ensure you have a server block (or Apache virtual host) for your domain.
Step 1 - Choosing Your Certificate Authority
Use a CA that is a member of major root programs (so browsers trust it) and that offers the certificate type you need. Below are the main factors to check.
Root Certificate Program Memberships
The most crucial point is that the CA that you choose is a member of the root certificate programs of the most commonly used operating systems and web browsers, i.e., it is a “trusted” CA, and its root certificate is trusted by common browsers and other software. If your website’s SSL certificate is signed by a trusted CA, its identity is considered to be valid by software that trusts the CA.
Most commercial CAs that you will encounter will be members of the common root CA programs, but it does not hurt to check before making your certificate purchase. For example, Apple publishes its list of trusted SSL root certificates.
Certificate Types
Ensure that you choose a CA that offers the certificate type that you require. Many CAs offer variations of these certificate types under a variety of names and pricing structures. Here is a short description of each type:
- Single Domain: Used for a single domain, e.g.
example.com. Note that additional subdomains, such aswww.example.com, are not included - Wildcard: Used for a domain and any of its subdomains. For example, a wildcard certificate for
*.example.comcan also be used forwww.example.comandstore.example.com - Multiple Domain: Known as a SAN or UC certificate, these can be used with multiple domains and subdomains that are added to the Subject Alternative Name field. For example, a single multi-domain certificate could be used with
example.com,www.example.com, andexample.net
In addition to the aforementioned certificate types, there are different levels of validations that CAs offer:
- Domain Validation (DV): DV certificates are issued after the CA validates that the requestor owns or controls the domain in question
- Organization Validation (OV): OV certificates can be issued only after the issuing CA validates the legal identity of the requestor
- Extended Validation (EV): EV certificates can be issued only after the issuing CA validates the legal identity, among other things, of the requestor, according to a strict set of guidelines. The purpose of this type of certificate is to provide additional assurance that the organization behind the site has been verified by the CA, which may be useful for internal policy, procurement, or compliance requirements. EV certificates can be single or multiple domain, but not wildcard
Quick Certificate Selection Guide
Use the following table to choose the right certificate type based on common real-world needs:
| Requirement | Recommended Certificate Type |
|---|---|
| Public website with basic HTTPS | Domain Validation (DV) |
| Company identity visible to users | Organization Validation (OV) or Extended Validation (EV) |
Many subdomains (for example *.example.com) |
Wildcard Certificate |
| Multiple unrelated domains | Multi-domain (SAN) Certificate |
| No automated renewal allowed | Commercial DV/OV Certificate |
| Regulatory or compliance requirements | OV or EV Certificate |
If you only need encryption and browser trust, DV certificates are sufficient. Choose OV or EV when legal identity verification or brand trust indicators are required.
Additional Features
Many CAs offer a large variety of “bonus” features to differentiate themselves from the rest of the SSL certificate-issuing vendors. Some of these features can end up saving you money, so it is important that you weigh your needs against the offerings before making a purchase. Examples of features to look out for include free certificate reissues or a single domain-priced certificate that works for www. and the domain basename, e.g. www.example.com with a SAN of example.com
Step 2 - Generating a CSR and Private Key
After you have your prerequisites sorted, and you know the type of certificate you need, it’s time to generate a certificate signing request (CSR) and private key.
If you are planning on using Apache HTTP or Nginx as your web server, you can use the openssl command to generate your private key and CSR on your web server. In this tutorial, you can keep all of the relevant files in your home directory, but feel free to store them in any secure location on your server:
To generate a private key and a CSR (replace example.com with your domain), run:
openssl req -newkey rsa:2048 -nodes -keyout example.com.key -out example.com.csr
For stronger security, you can use 4096-bit RSA: replace rsa:2048 with rsa:4096. Key size affects TLS handshake performance slightly; 2048 is widely accepted, 4096 is recommended where compliance or policy requires it.
At this point, you will be prompted for several lines of information that will be included in your certificate request. The most important part is the Common Name field, which should match the name that you want to use your certificate with, for example, example.com, www.example.com, or (for a wildcard certificate request) *.example.com. If you are planning on getting an OV or EV certificate, ensure that all of the other fields accurately reflect your organization or business details. Providing a “challenge password” is not necessary.
For example:
OutputCountry Name (2 letter code) [AU]:US
State or Province Name (full name) [Some-State]:New York
Locality Name (eg, city) []:New York
Organization Name (eg, company) [Internet Widgits Pty Ltd]:My Company
Organizational Unit Name (eg, section) []:
Common Name (e.g. server FQDN or YOUR name) []:example.com
Email Address []:sammy@example.com

Please enter the following 'extra' attributes
to be sent with your certificate request
A challenge password []:
An optional company name []:
This will generate a .key and .csr file. The .key file is your private key, and should be kept secure. The .csr file is what you will send to the CA to request your SSL certificate.
ls example.com*
Outputexample.com.csr example.com.key
You will need to copy and paste your CSR when submitting your certificate request to your CA. To print the contents of your CSR, use cat:
cat example.com.csr
Now you are ready to buy a certificate from a CA.
Step 3 - Purchasing and Obtaining a Certificate
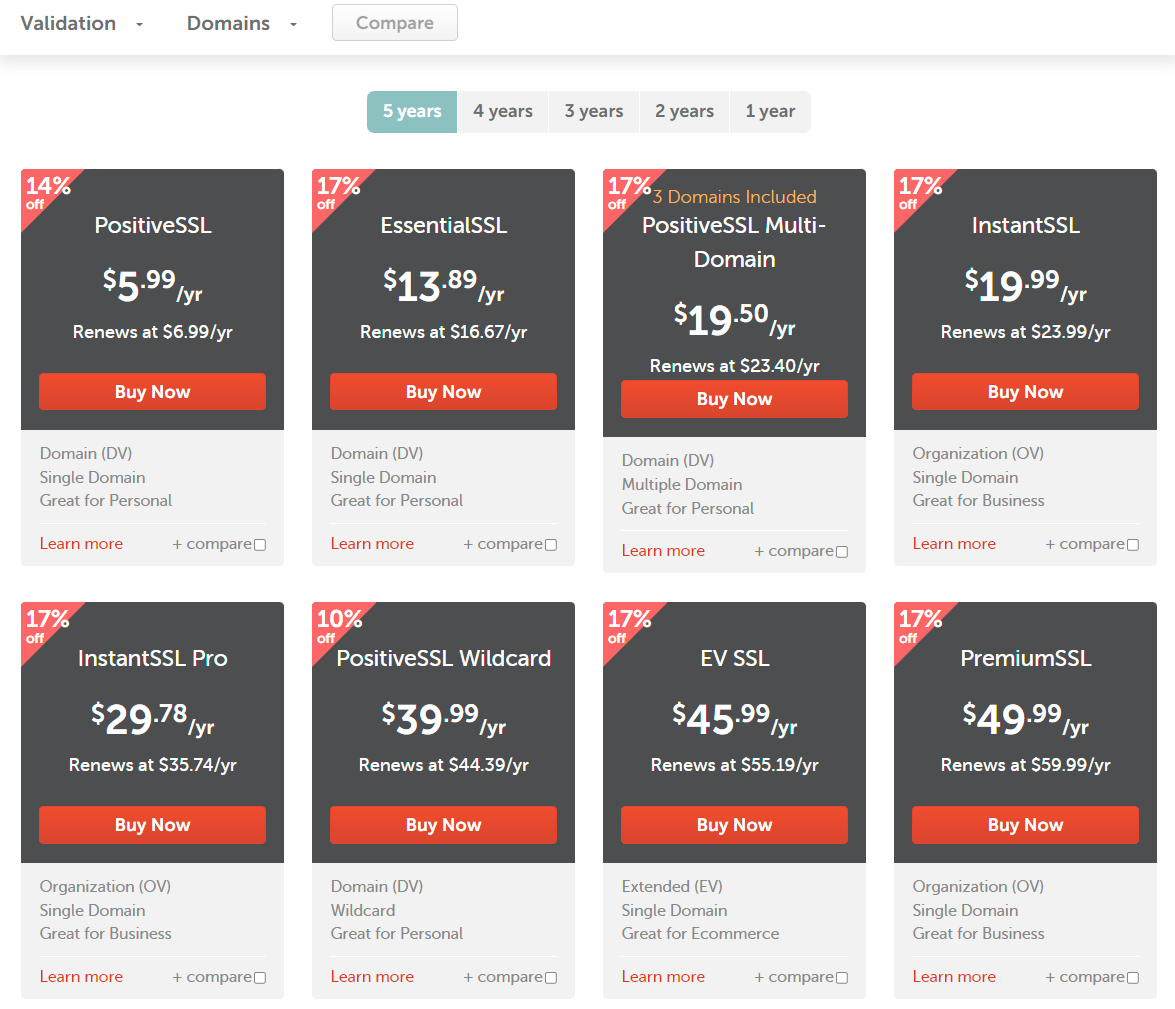
There are many commercial CA providers, and you can compare and contrast the most appropriate options for your own setup. For example, Namecheap acts as an SSL certificate reseller, and has changed upstream CA providers in the past to provide the best value. Many resellers (e.g. Namecheap) offer certificates from trusted CAs such as Sectigo/Comodo. Here is a sample of typical offerings:
After making a selection, you will need to upload the CSR that you generated in the previous step. Your CA provider will also likely have an “Approver” step, which will send a validation request email to an address in your domain’s WHOIS record or to an administrator type address of the domain that you are getting a certificate for.
After approving the certificate, the certificate will be emailed to the named administrator. Copy and save them to your server in the same location that you generated your private key and CSR. Name the certificate with the domain name and a .crt extension, e.g. example.com.crt, and name the intermediate certificate intermediate.crt.
The certificate is now ready to be installed on your web server, but first, you may have to make some changes to your firewall.
Step 4 - Updating Your Firewall to Allow HTTPS
If you have the ufw firewall enabled as recommended by our Ubuntu setup guide, you’ll need to adjust the settings to allow HTTPS traffic. Nginx and Apache both register a few profiles with ufw upon installation.
You can see the current setting by typing:
sudo ufw status
If you receive output containing just Nginx HTTP or Apache, only HTTP traffic is allowed to the web server:
OutputStatus: active

To                         Action      From
--                         ------      ----
OpenSSH                    ALLOW       Anywhere
Nginx HTTP                 ALLOW       Anywhere
OpenSSH (v6)               ALLOW       Anywhere (v6)
Nginx HTTP (v6)            ALLOW       Anywhere (v6)
To allow HTTPS traffic, enable the Nginx Full or Apache Full profile and remove the HTTP-only profile:
sudo ufw allow 'Nginx Full'
sudo ufw delete allow 'Nginx HTTP'
For Apache, use Apache Full and remove Apache if only HTTP was allowed:
sudo ufw allow 'Apache Full'
sudo ufw delete allow 'Apache'
Then confirm the result:
sudo ufw status
OutputStatus: active

To                         Action      From
--                         ------      ----
OpenSSH                    ALLOW       Anywhere
Nginx Full                 ALLOW       Anywhere
OpenSSH (v6)               ALLOW       Anywhere (v6)
Nginx Full (v6)            ALLOW       Anywhere (v6)
In the final step, you’ll install the certificate.
Step 5 - Installing the Certificate on Your Server
After acquiring your certificate from the CA of your choice, you need to install it on your web server. This involves adding a few SSL-related lines to your web server software configuration.
This tutorial covers Nginx and Apache on Ubuntu (compatible with Ubuntu 22.04 and later); most modern Linux distributions work similarly. This tutorial also makes these assumptions:
- The private key is called
example.com.key - The SSL certificate is called
example.com.crt - The CA intermediate certificate(s) returned by your provider are in a file called
intermediate.crt
Note: In a production environment, these files should be stored somewhere that only the web server process (usually root) can access, and the private key should be kept secure. For example, Let’s Encrypt stores the certificates it generates in /etc/letsencrypt. Production examples will vary due to the complexity of multi-server configurations.
Nginx
These are the steps to manually deploy an SSL certificate on Nginx.
Browsers need the full chain (your certificate plus the CA’s intermediate(s)) to trust your site. If your CA returned only an intermediate certificate (or multiple intermediates), you must create a single chained file that contains your certificate followed by the intermediate(s). Nginx expects one file for ssl_certificate; Apache can use a separate intermediate file (see Apache section below).
In production environments, store certificates in system locations instead of home directories. Common paths include /etc/ssl/certs for certificate files and /etc/ssl/private for private keys. Restrict private key permissions to root only:
sudo chmod 600 /etc/ssl/private/example.com.key
sudo chown root:root /etc/ssl/private/example.com.key
Assuming your certificate file is example.com.crt and the intermediate is intermediate.crt, create the chained file:
cat example.com.crt intermediate.crt > example.com.chained.crt
Some certificate authorities provide multiple intermediate certificates. If your CA provides more than one intermediate, append them in the order specified by the CA documentation, directly after your site certificate. Incorrect ordering can cause browser trust errors even when all files are present.
Using nano or your favorite text editor, open your default Nginx server block file for editing:
sudo nano /etc/nginx/sites-enabled/default
Find the listen directive, and modify it to listen 443 ssl:
…
server {
    listen 443 ssl;
…
Next, find the server_name directive within that same server block, and make sure that its value matches the common name of your certificate. Also, add the ssl_certificate and ssl_certificate_key directives to specify the paths of your certificate and private key files:
…
    server_name example.com;
    ssl_certificate /home/sammy/example.com.chained.crt;
    ssl_certificate_key /home/sammy/example.com.key;
…
If you moved your certificate and key files to /etc/ssl/certs and /etc/ssl/private, update these paths accordingly.
To allow only the most secure SSL protocols and ciphers, add the following lines to the file:
…
    ssl_protocols TLSv1.2 TLSv1.3;
    ssl_prefer_server_ciphers off;
    ssl_ciphers ECDHE-ECDSA-AES128-GCM-SHA256:ECDHE-RSA-AES128-GCM-SHA256:ECDHE-ECDSA-AES256-GCM-SHA384:ECDHE-RSA-AES256-GCM-SHA384;
…
Finally, to redirect HTTP requests to HTTPS by default, you can add an additional server block at the top of the file:
server {
    listen 80;
    server_name example.com;
    return 301 https://$server_name$request_uri;
}
…
Save and close the file. If you are using nano, press Ctrl+X, then when prompted, Y and then Enter.
Before restarting Nginx, you can validate your configuration by using nginx -t:
sudo nginx -t
If there aren’t any problems, reload Nginx to apply the SSL configuration (or use sudo systemctl restart nginx if your setup does not support reload):
sudo systemctl reload nginx
Test by opening your site over HTTPS (e.g. https://example.com) and over HTTP (e.g. http://example.com) to confirm the redirect works.
Apache
These are the steps to manually deploy an SSL certificate on Apache.
Using nano or your favorite text editor, open your default Apache virtual host file for editing:
Note: On Ubuntu, the recommended approach is to use the preconfigured default-ssl.conf file instead of modifying 000-default.conf directly. You can enable it with sudo a2ensite default-ssl after updating the certificate paths. The method shown below works, but using default-ssl.conf aligns better with standard Apache SSL layouts.
sudo nano /etc/apache2/sites-available/000-default.conf
Find the <VirtualHost *:80> entry and modify it so your web server will listen on port 443:
…
<VirtualHost *:443>
…
Next, add the ServerName directive, if it doesn’t already exist:
…
ServerName example.com
…
Then add the following lines to specify your certificate and key paths:
…
SSLEngine on
SSLCertificateFile /home/sammy/example.com.crt
SSLCertificateKeyFile /home/sammy/example.com.key
SSLCACertificateFile /home/sammy/intermediate.crt
…
In production deployments, move certificate files to /etc/ssl/certs and private keys to /etc/ssl/private, and ensure the private key is readable only by root. This prevents accidental exposure and follows standard Linux security conventions.
At this point, your server is configured to listen on HTTPS only (port 443), so requests to HTTP (port 80) will not be served. To redirect HTTP requests to HTTPS, add the following to the top of the file (substitute the name in both places):
<VirtualHost *:80>
   ServerName example.com
   Redirect permanent / https://example.com/
</VirtualHost>
…
Save and close the file. If you are using nano, press Ctrl+X, then when prompted, Y and then Enter.
Enable the Apache SSL module by running this command:
sudo a2enmod ssl
Now, restart Apache to load the new configuration and enable TLS/SSL over HTTPS.
sudo systemctl restart apache2
Confirm by visiting your site over HTTPS and HTTP to verify the certificate and redirect.
Verifying Your SSL Installation
After installing your certificate, verify that the chain is complete and the server presents a trusted certificate.
From the command line, use OpenSSL to connect and inspect the chain (replace example.com with your domain):
echo | openssl s_client -connect example.com:443 -servername example.com 2>/dev/null | openssl x509 -noout -dates -subject -issuer
You should see your certificate’s subject (CN=example.com or similar), issuer (the CA), and validity dates. To see the full chain and any verification errors:
openssl s_client -connect example.com:443 -servername example.com
Look for Verify return code: 0 (ok) at the end. Any other return code usually means a missing or wrong intermediate certificate.
In the browser, open https://example.com, click the padlock, and view the certificate. The chain should show: your site certificate, then intermediate(s), then root. If the chain is broken, the padlock may show a warning or “Certificate not trusted.”
Troubleshooting Common SSL Installation Errors
Browser Shows “Your connection is not private” or “Certificate not trusted”
Cause: The browser cannot build a full chain to a trusted root. Usually the intermediate certificate(s) are missing or in the wrong order.
Fix for Nginx: Ensure you use the chained file (your cert + intermediate(s)), not only example.com.crt. Order must be: site certificate first, then intermediate(s). Recreate the chained file if needed:
cat example.com.crt intermediate.crt > example.com.chained.crt
Point ssl_certificate to example.com.chained.crt and reload Nginx.
Fix for Apache: Set SSLCertificateFile to your site cert and SSLCACertificateFile to the intermediate file. Some setups use SSLCertificateChainFile (deprecated in newer Apache) or include intermediates in a single file; follow your CA’s instructions.
“SSL: wrong version number” or “rx record too long”
Cause: The client is hitting the wrong port (e.g. HTTP on 443) or the server is not speaking TLS on 443.
Fix: Confirm the web server is listening on 443 and that listen 443 ssl (Nginx) or <VirtualHost *:443> with SSLEngine on (Apache) is in the correct virtual host. See TLS vs SSL for context on protocol naming.
Private key and certificate mismatch
Cause: The certificate was issued for a different key than the one in ssl_certificate_key or SSLCertificateKeyFile. Servers will fail to start or TLS handshakes will fail.
Fix: Verify that the modulus of the key and certificate match:
openssl x509 -noout -modulus -in example.com.crt | openssl sha256
openssl rsa -noout -modulus -in example.com.key | openssl sha256
The two hashes must be identical. If not, use the key that was used to generate the CSR you submitted to the CA.
Nginx or Apache fails to start after config change
Cause: Syntax error, wrong path to cert/key, or missing intermediate file.
Fix: Run sudo nginx -t (Nginx) or sudo apachectl configtest (Apache) and fix any reported errors. Ensure file paths are correct and the web server user can read the certificate and key files (and that the key is not world-readable).
Renewing and Managing Commercial Certificates
Commercial certificates typically have a 1- or 2-year validity. Plan renewal before expiry to avoid downtime.
- Set a reminder (e.g. 30-60 days before expiry). Many CAs send email reminders; do not rely on them alone.
- Generate a new CSR (and ideally a new private key) using the same steps as initial issuance. Some CAs allow you to reuse an existing key, but key rotation at renewal is a common best practice, and it reduces risk if a key was ever exposed.
- Submit the CSR to your CA, complete validation, and obtain the new certificate and intermediate(s).
- Install the new certificate (and chain) on the server, then reload Nginx or Apache. Keep the old cert available until you confirm the new one works.
- Verify with
openssl s_clientor the browser as above.
Store private keys and certificates in a secure, restricted location (e.g. /etc/ssl/private with root-only read). For load-balanced or multi-server setups, deploy the same cert and key to each node or use a central secrets store.
Frequently Asked Questions
What is a commercial SSL certificate?
A commercial SSL/TLS certificate is one you purchase from a trusted certificate authority (CA) or reseller. It is signed by the CA’s root or intermediate, so browsers and operating systems that trust that CA will trust your site. Commercial certs often offer longer validity (1-2 years) and may include vendor features like support SLAs, managed reissues, warranty/contract terms, or organization vetting.
When should I use a paid SSL certificate instead of Let’s Encrypt?
Use a commercial certificate when you need longer validity without frequent renewal automation, require organization vetting for internal policy/compliance reasons, or need CA/vendor features such as managed reissues, support SLAs, or specific warranty/contract terms. Let’s Encrypt supports both multi-domain and wildcard certificates (typically via DNS validation), so the decision is usually about renewal/automation constraints, compliance requirements, or vendor features rather than technical capability.
What information is required to generate a CSR?
You need: Common Name (CN), the exact domain (e.g. example.com, www.example.com, or *.example.com for wildcard). For OV/EV, the CA will also use Organization, Locality, State, Country from the CSR to validate your organization. Optional: email, organizational unit. A challenge password is not required.
What is the difference between a private key and a certificate?
The private key is a secret you generate and keep on the server; it is used to decrypt traffic and prove ownership of the certificate. The certificate is a public document signed by the CA that binds your domain (and optionally organization) to that public key. You send the CA a CSR (which contains the public key but not the private key); they return the certificate. Never share or upload the private key.
What are intermediate certificates and why are they required?
Intermediates are CA-issued certificates that link your site certificate to a root CA that browsers trust. Browsers only store roots; they need the intermediate(s) to build a chain from your cert to a trusted root. If you don’t serve intermediates, the chain is incomplete and browsers may show “certificate not trusted.”
How do I install an SSL certificate on Nginx?
Generate a chained file: cat example.com.crt intermediate.crt > example.com.chained.crt. In your Nginx server block for 443, set ssl_certificate to the chained file and ssl_certificate_key to your private key. Use ssl_protocols TLSv1.2 TLSv1.3; and strong ciphers, then reload Nginx. See Step 5 above for full details.
How do I install an SSL certificate on Apache?
Enable the SSL module (sudo a2enmod ssl), then in a <VirtualHost *:443> block set SSLEngine on, SSLCertificateFile to your site cert, SSLCertificateKeyFile to your key, and SSLCACertificateFile to the intermediate. Restart Apache. See Step 5 above for full details.
How do I verify that my SSL certificate is installed correctly?
Use openssl s_client -connect example.com:443 -servername example.com and check for Verify return code: 0 (ok). In the browser, open https://example.com, click the padlock, and confirm the certificate chain is complete and the validity period is correct.
What causes SSL certificate trust errors in browsers?
Common causes: missing or incorrectly ordered intermediate certificates; certificate expired or not yet valid; hostname mismatch (e.g. cert for www.example.com but you opened example.com); or the certificate was issued for a different key than the one configured. Fix by serving the full chain, correcting the key/cert pair, and ensuring the certificate’s Common Name or SAN matches the host you’re visiting.
Conclusion
You now know how to choose a commercial CA, generate a CSR and private key, obtain and install an SSL/TLS certificate on Nginx or Apache, verify the installation, and troubleshoot common chain and key issues. Keeping the certificate chain complete and the private key secure is essential for browser trust and production reliability.
For next steps, see TLS vs SSL, OpenSSL essentials for certificates and CSRs, and how to secure Nginx with Let’s Encrypt if you later switch to free certificates. For SSL on load balancers and other use cases, see the SSL certificate glossary and network load balancing.
Thanks for learning with the DigitalOcean Community. Check out our offerings for compute, storage, networking, and managed databases.
About the author(s)
Software Engineer @ DigitalOcean. Former Señor Technical Writer (I no longer update articles or respond to comments). Expertise in areas including Ubuntu, PostgreSQL, MySQL, and more.
Former Senior DevOps Technical Writer at DigitalOcean. Expertise in topics including Ubuntu 22.04, Linux, Rocky Linux, Debian 11, and more.
Building future-ready infrastructure with Linux, Cloud, and DevOps. Full Stack Developer & System Administrator. Technical Writer @ DigitalOcean | GitHub Contributor | Passionate about Docker, PostgreSQL, and Open Source | Exploring NLP & AI-TensorFlow | Nailed over 50+ deployments across production environments.
Still looking for an answer?
This textbox defaults to using Markdown to format your answer.
You can type !ref in this text area to quickly search our full set of tutorials, documentation & marketplace offerings and insert the link!
Hi, when I try and run:
$ openssl req -newkey rsa:2048 -nodes -keyout mydomain.com.key -out mydomain.com.csr
I get:
WARNING: can’t open config file: /usr/lib/ssl/openssl.cnf Unable to load config info from /usr/lib/ssl/openssl.cnf
Please help!
I am now unable to access the domain without HTTPS, is there a way to fix this?
Great guide btw.
Thanks
nginx, I solved it by adding an additional server directive.
server {
    listen      80;

    location / {
      rewrite     ^(.*)   https://mysite.com$1 permanent;
    }
Here’s the link to the stack page: http://serverfault.com/questions/67316/in-nginx-how-can-i-rewrite-all-http-requests-to-https-while-maintaining-sub-dom
I’d recommend adding this to the guide as it it’s a PITA if it only accepts https and does not force a re-direct.
In my opinion the tutorial should onclude compatbility with a non-ssl version of the web.
When I run the following setup
root@example:/etc/ssl/nginx# cat www.example.com.crt intermediate.crt > www.example.com.chained.crt<^>
I receive the following response
-bash: syntax error near unexpected token `newline'
Any ideas? I’m trying to chain a GoDaddy EV SSL, which I downloaded as Apache server type.
My site is coming up as internal server error (https://rynopower.com/) Even though the SSL appears to be working. (Green lock is showing) Using PositiveSSL from Namecheap. SSL checking: https://www.sslchecker.com/sslchecker
Running off of the Wordpress Ubuntu 14.04 Image.
Created the ca-bundle with the four files provided by Namecheap:
cat rynopower_com.crt COMODORSADomainValidationSecureServerCA.crt COMODORSAAddTrustCA.crt AddTrustExternalCARoot.crt > rynopower.ca-bundle
All files are currently in /etc/ssl/
CSR and Key that was generated are in the same folder currently.
Relevant lines for default-ssl.conf:
<IfModule mod_ssl.c> <VirtualHost default:443> ServerAdmin webmaster@localhost ServerName rynopower.com:443 SSLEngine on SSLCertificateFile /etc/ssl/rynopower_com.crt SSLCertificateKeyFile /etc/ssl/rynopower.key SSLCertificateChainFile /etc/ssl/rynopower.ca-bundle
Any idea why my site wouldn’t work on https? It still works fine on http, and the lock comes up for https, just no content
When trying to restart I get this:
Output of config test was: AH00526: Syntax error on line 34 of /etc/apache2/sites-enabled/default-ssl.conf: SSLCertificateFile: file ‘/etc/apache2/ssl/certs/teampunt.co.uk.crt’ does not exist or is empty Action ‘configtest’ failed. The Apache error log may have more information.
does anyone know why? I bought the cert from godaddy
HI there, thank you for this great article… when my ssl-provider issued my ssl certification i got with the certification two more files, first : COMODORSAAddTrustCA, second : COMODORSADomainValidationSecureServerCA
but in your article you did’t mention anything about those more certifications, so can you give me some explanation about those more certifications ? where would i use them ?
Best regards
“free StartSSL certificates are not trusted by some browsers”.
Hmm, do you have any evidence of that? I’m getting an A+ rating from the Qualisys test with a free StartSSL certificate, and I’ve never heard of any current browser rejected a startSSL certificate.
Might also be worth mentioning Cloudflare’s free Universal SSL offering, which “hides” a free server-signed key behind a “valid” key for “end to end” SSL, or even offers to make ANY website SSL, without a server-side certificate needed. https://blog.cloudflare.com/introducing-universal-ssl/
 This work is licensed under a Creative Commons Attribution-NonCommercial- ShareAlike 4.0 International License.
Become a contributor for community
Get paid to write technical tutorials and select a tech-focused charity to receive a matching donation.

DigitalOcean Documentation
Full documentation for every DigitalOcean product.

Resources for startups and AI-native businesses
The Wave has everything you need to know about building a business, from raising funding to marketing your product.
The developer cloud
Scale up as you grow — whether you're running one virtual machine or ten thousand.

Start building today
From GPU-powered inference and Kubernetes to managed databases and storage, get everything you need to build, scale, and deploy intelligent applications.
